So I have put together a little tutorial on how I do my simple but (hopefully) effective bases.
WARNING... this post contains obvious and unashamed product placing...


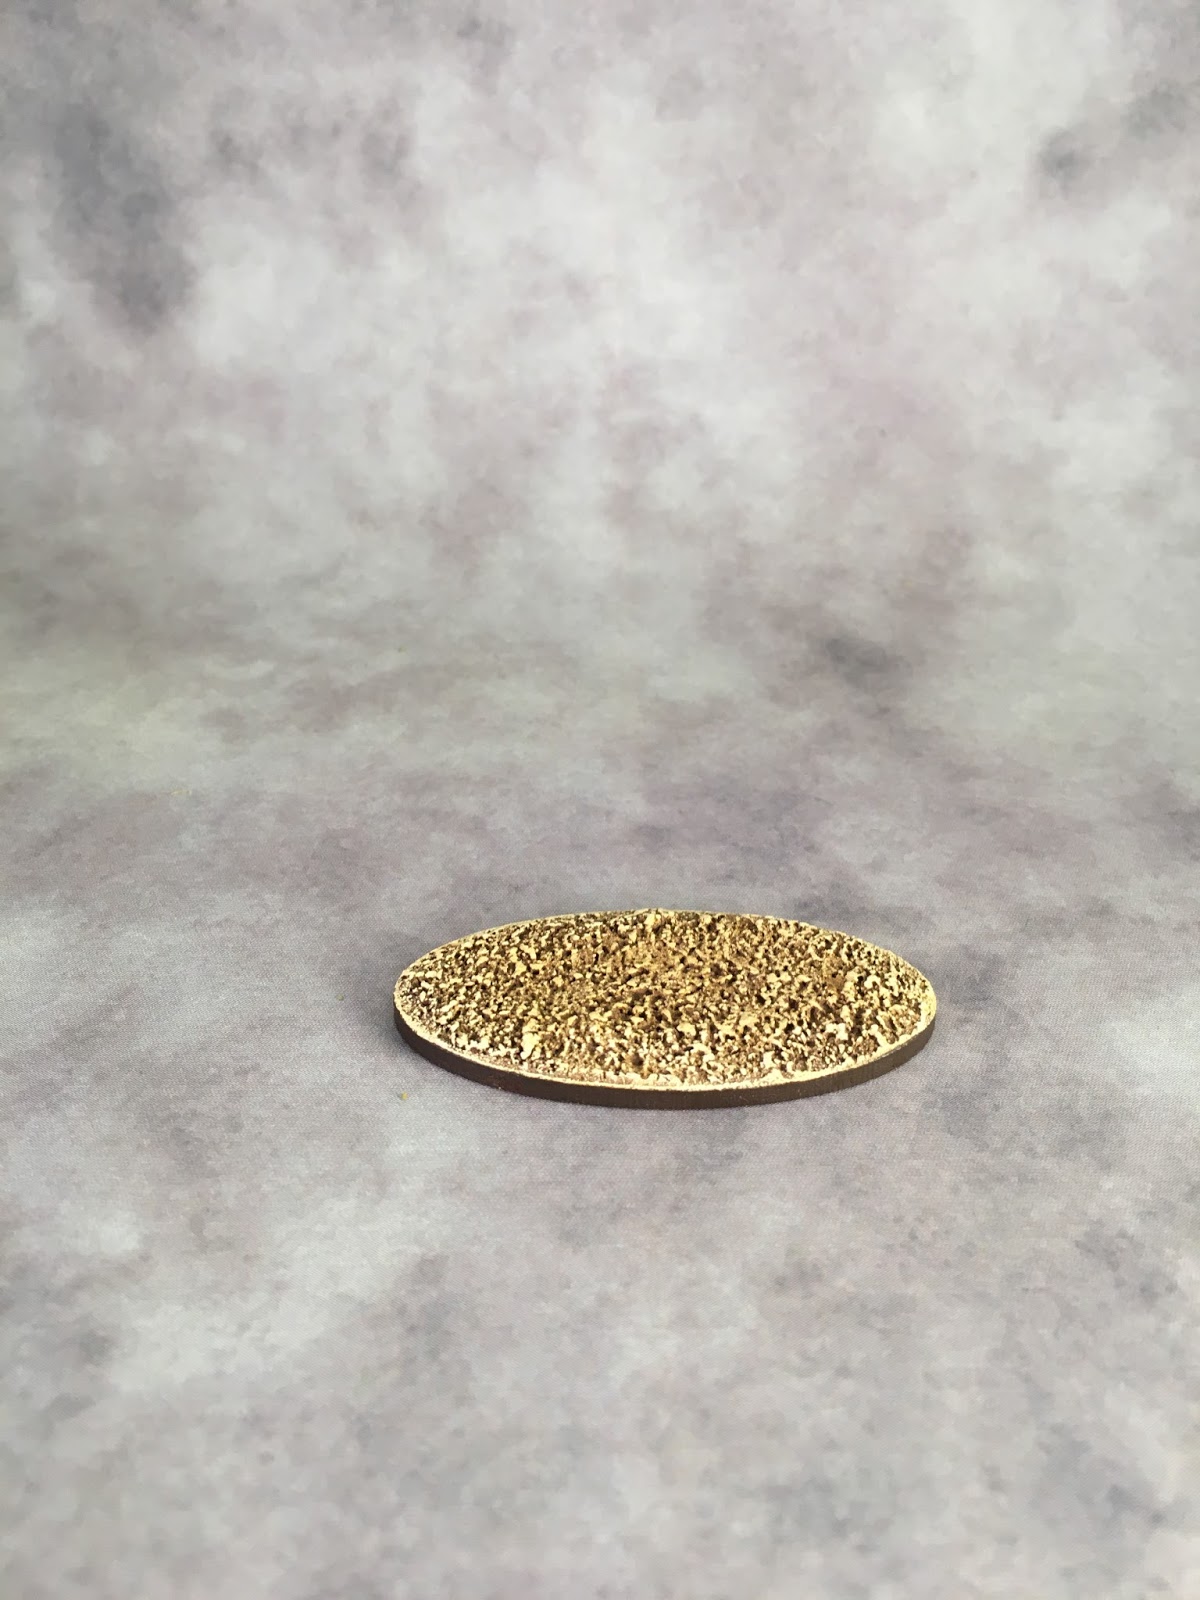
The first stage is to texture the base...
I get all my bases from War Bases... https://warbases.co.uk/
I apply a thin layer of lightweight filler to the surface of the base.
I discovered this material by accident at my local Wilcos (this is a British hardware-general store)
when I picked up a tub of filler that appeared to be empty, the only way I can describe it is aerated polyfiller...it doesn't appear to have any real shrinkage and therefore doesn't cause any warping.

Wilkos lightweight filler.
Next I stipple the filler using a cheap firm artists brush...

A cheap artist brush...
I use Tamiya flat earth diluted with about 30% of Tamiya thinner.
The combination of the lightweight filler the diluted paint and capillary action means that paint is sucked across the surface of the base, making it much easier to get between legs and other obstacles.

Tamiya paint...
I dry brush the base with Wargames Foundry's Boneyard trilogy ...

Yup!...no surprises there...
I edge the base with Citadel Dryad Bark... I like my base to have a dark edge, I feel it frames the figures... if that is not your thing , just ignore this bit...

You still get to see the paint pot...
The dry brushed base...
I apply PVA from a small bottle with a nozzle... putting it on quite thick...

And there it is...
Next I cover it in static grass and leave to dry thoroughly..

Yes its static grass... I really cant do any product placement here... my static grass is made from a mix of different materials from different sources...I put all of the flock I had acquired over the years into one box and mixed it around until I got a colour I liked.

A grassy base...
Okay now its time for my little innovation...
I wet brush (for want of a better description) PVA onto areas of the static grass...

Then I dunk the base into K&M Medium Olive scatter material...

What I am trying to recreate is the look of the different small leaved plants that you find meadows and uncultivated ground...a bit like my garden.
K&M make red and yellow scatter so you could do some sort of floral arrangement if you really wanted to.

All done...
I hope this slightly light hearted tutorial has been of some help to you.
I have earned no money from the product placement on this tutorial.....yet!
All the best. Aly
Thanks Aly, that's great. The great things about this hobby is that there is always something different to learn and the sharing of ideas amongst the community.
ReplyDeleteNice tutorial Alys - that Wilkos filler looks with investigating.
ReplyDeleteSimon.
Thanks for the tutorial. I believe that Homebase do a similar filler.
ReplyDeleteTony
One of the most interesting facets of the wargaming hobby is learning how others go about it with their painting, basing, modelling, and so forth. Great tutorial!
ReplyDeleteBest Regards,
Stokes